Follow the below step by step instructions to set up your email account on your iPhone device.
- Go to Settings > Passwords & Accounts, then tap Add Account
- Select the type of email account you want. We offer two types.
- Select IMAP if you only want your phone to sync your email, not Calendar or Contacts
- Select Exchange if you want your phone to sync your email, Calendar and Contacts
- Decide if you would like all your work contacts and work calendar to display on your phone or not.
- Note: If you choose Exchange for syncing email, calendar and contacts, the server will require you to add a pass code to your phone, if you don’t have one set up.
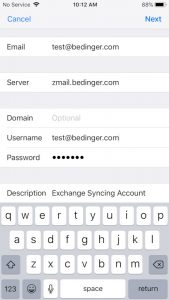
- Enter your name, email address (all lower case), password (case sensitive), and a description for your account, for example work email or your email address.
Click for larger view
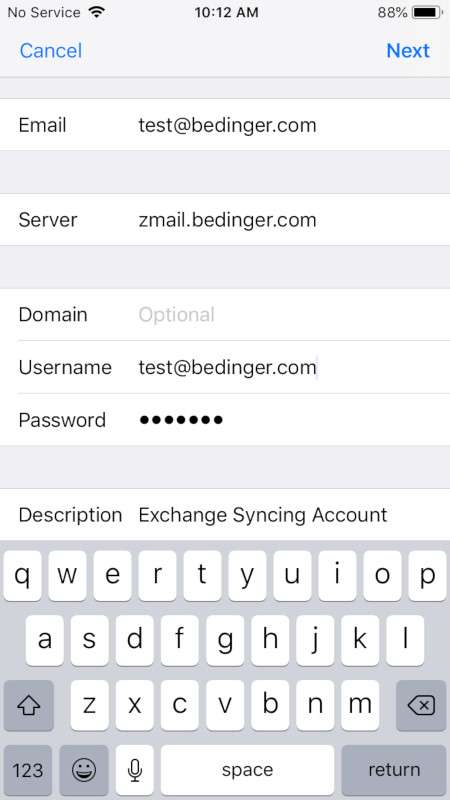
- Tap Next.
- Enter the information for Incoming Mail Server and Outgoing Mail Server: zmail.bedinger.com
Click for larger view
- Tap Next.
- If your email settings are correct, tap Save to finish.
- If the email settings are incorrect, you’ll be asked to edit them. Remember your email address should be in all lower case, and your password is case sensitive. Double check the spelling of your out-going and in-coming mail servers as well.
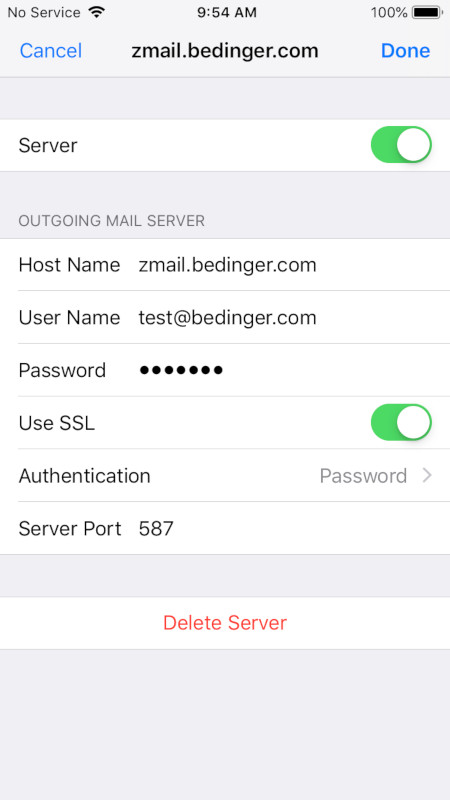
Note: If you can receive email but not send email, you need to set Authentication to password, and enter your email address and email password. The server only allows it’s users to send messages through the system.
In the “Authentication” section double check it is set it to “Password”
Click for larger view
Once your account is all set up, depending on your mailbox size and Internet speed, it will be fully synced with the server in about 15 minutes to 1 hour.